Work Healthy Australia
Online Appointment Scheduler
Help

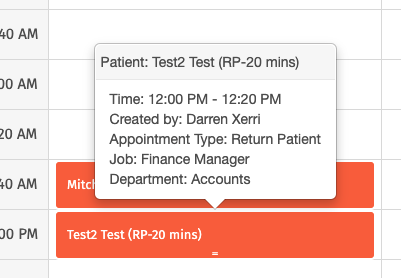
To quick-view appointment details without having to open the appointment window, simply hover over the calendar entry.
Quick-view allows you to see:
- Appointment from and to time
- Who created the appointment
- Appointment type
- Patient job (if entered)
- Patient department (if entered)
The following features allow you to quickly and easily view and manage your appointments with Work Healthy Australia.
Colour-coded appointment tiles and appointment codes make it easier to identify different appointment types in your calendar.
Note: the below feature will be available from Monday 7 Aug, 2023.
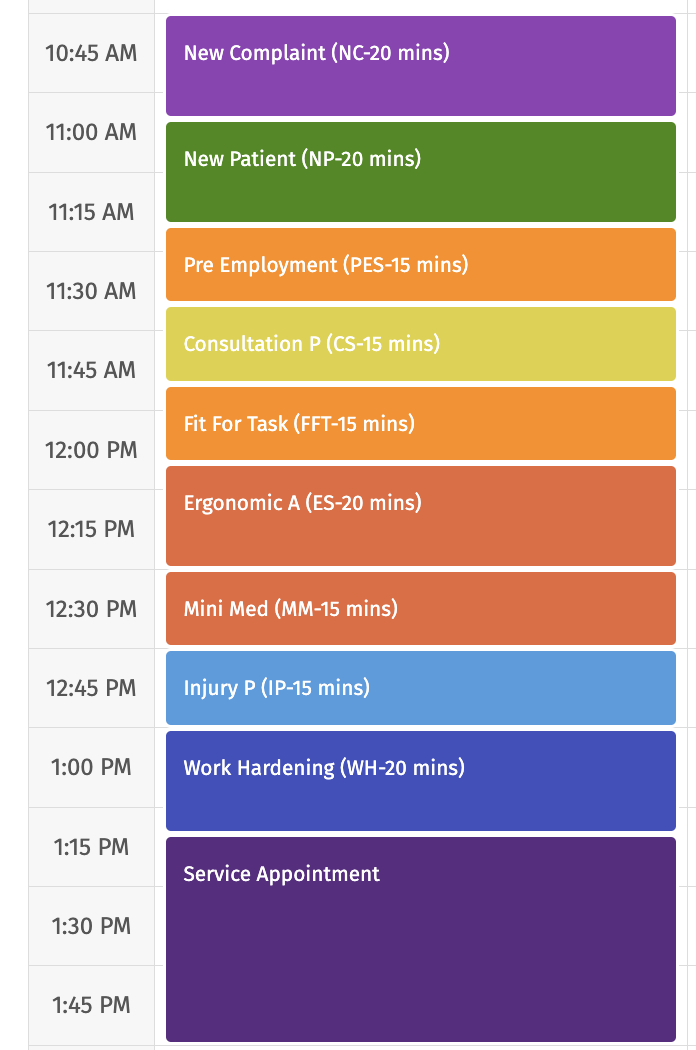
Colour codes:
Light purple – New complaint
Green – New Patient
Light orange – Pre-employment and Fit for Task assessments
Yellow – Consultation
Dark orange – Ergonomic assessments and Mini-medicals
Light blue – Injury Prevention
Dark blue – Work Hardening
Dark purple – Service appointments & meetings
Service times
Your regular agreed service times are easily identified by the white space in your calendar view. Shaded areas indicate times outside of your regular service times.
From time to time it may be necessary to book appointments outside of your regular scheduled hours. Please discuss any additional service requirements with Operations or your Onsite Health Provider before making any bookings.
When you book appointments outside of your regular service times, you will be prompted to confirm the appointment and a notification will be sent to our Operations team to keep them informed.
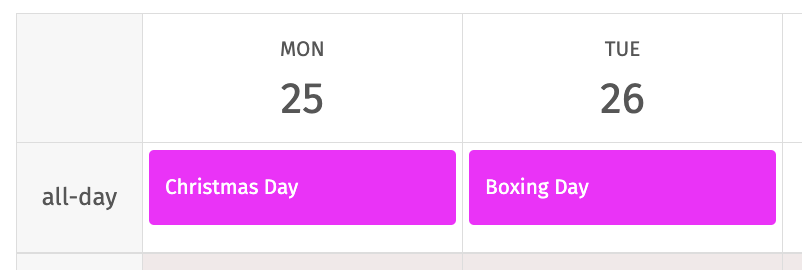
Public Holidays
Public holidays are displayed at the top of the calendar in pink. This includes national and state-specific dates.
Note: the below feature will be available from Monday 7 Aug, 2023.
Appointment codes:
NC – New Complaint
NP – New Patient
RP – Return Patient
PES – Pre-employment Screen
FFT – Fit for Task Assessment
ER – Ergonomic Assessment
CS – Consultation
MM – Mini-Medical
IP – Injury Prevention
WH – Work Hardening
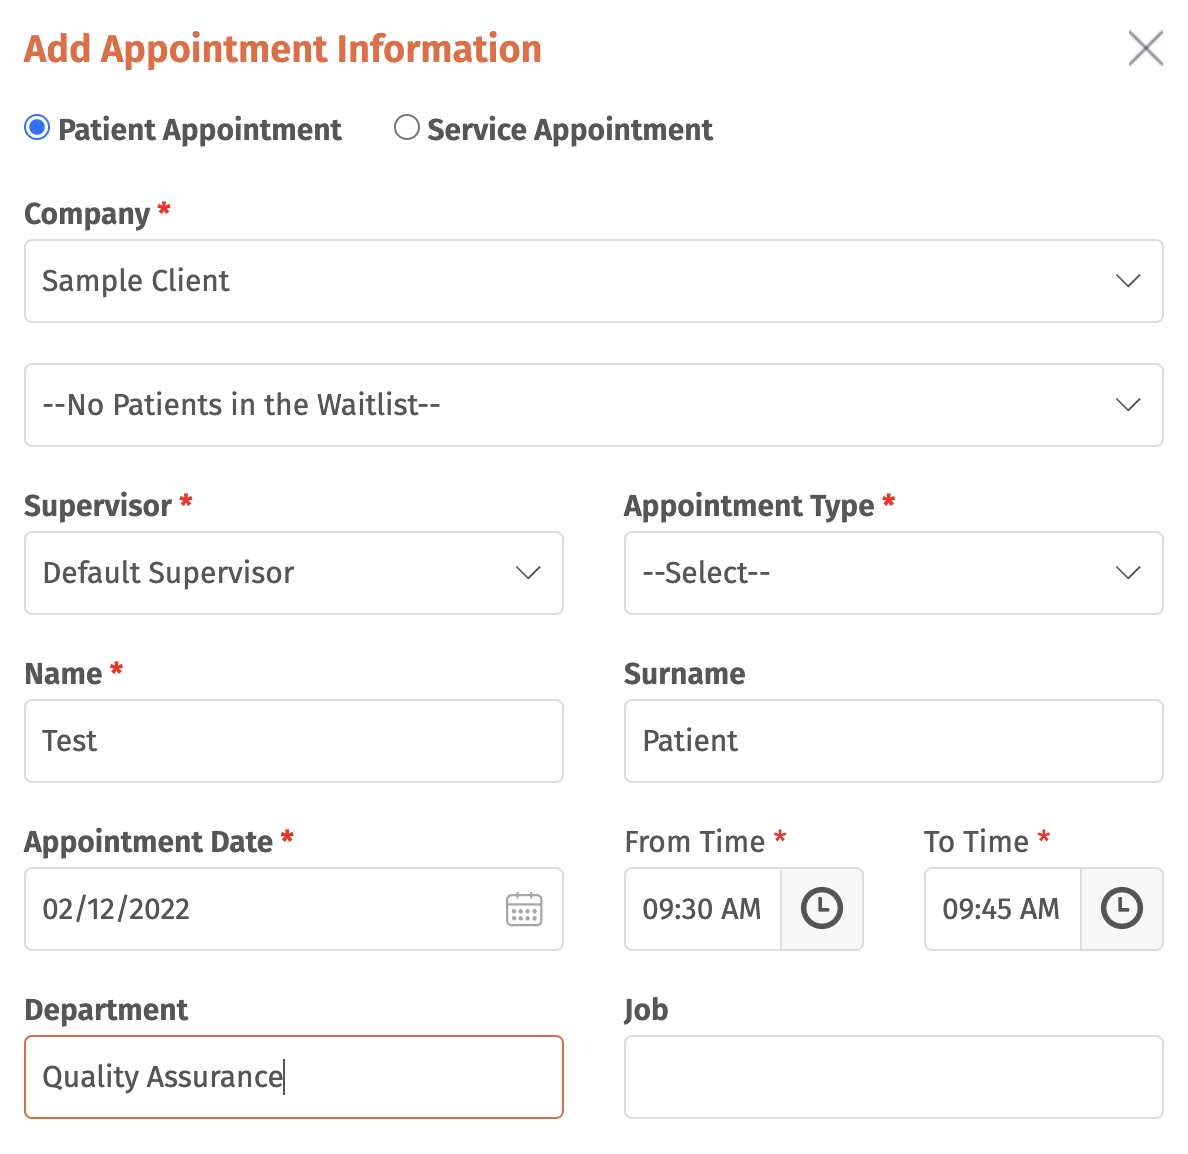
This feature allows you to schedule appointments for your staff, or allocate time in your schedule for additional onsite services and meetings with your Work Healthy Australia provider.
To ensure our providers are able to deliver the best service possible, some appointment types require a minimum notice period. Read more about appointment types here.
- Click on the
 button (+Add Appointment)
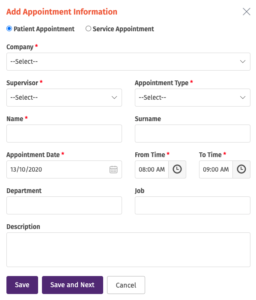
 - Ensure Patient Appointment is selected
- Select the relevant Company
- Select the relevant Supervisor
- Select the Appointment Type (see Patient Appointment Definitions)
- Complete the following fields:
- Patient First Name
- Optional: Patient Surname
- Appointment Date
- Appointment From Time (Appointment end but can be adjusted if required)
- Patient First Name
- Optional: you may also like to list the patient’s Department and Job
- Optional: add a short description for Work Healthy Australia.
For example: important information about the worker’s injury, or a note about a worker’s compensation claim. - Click Save or Save and Next to add the appointment to your schedule
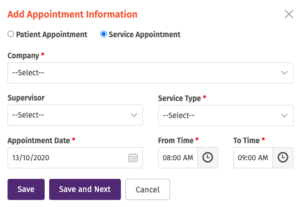
- Click on the button (+Add Appointment)
- Ensure Service Appointment is selected
- Select the relevant Company
- Optional: Select the relevant Supervisor
- Select the Service Type (see Service Appointment Definitions)
- Complete the following fields:
- Appointment Date
- Appointment From Time (Appointment end but can be adjusted if required)
- Appointment Date
- Click Save or Save and Next to add the appointment to your schedule
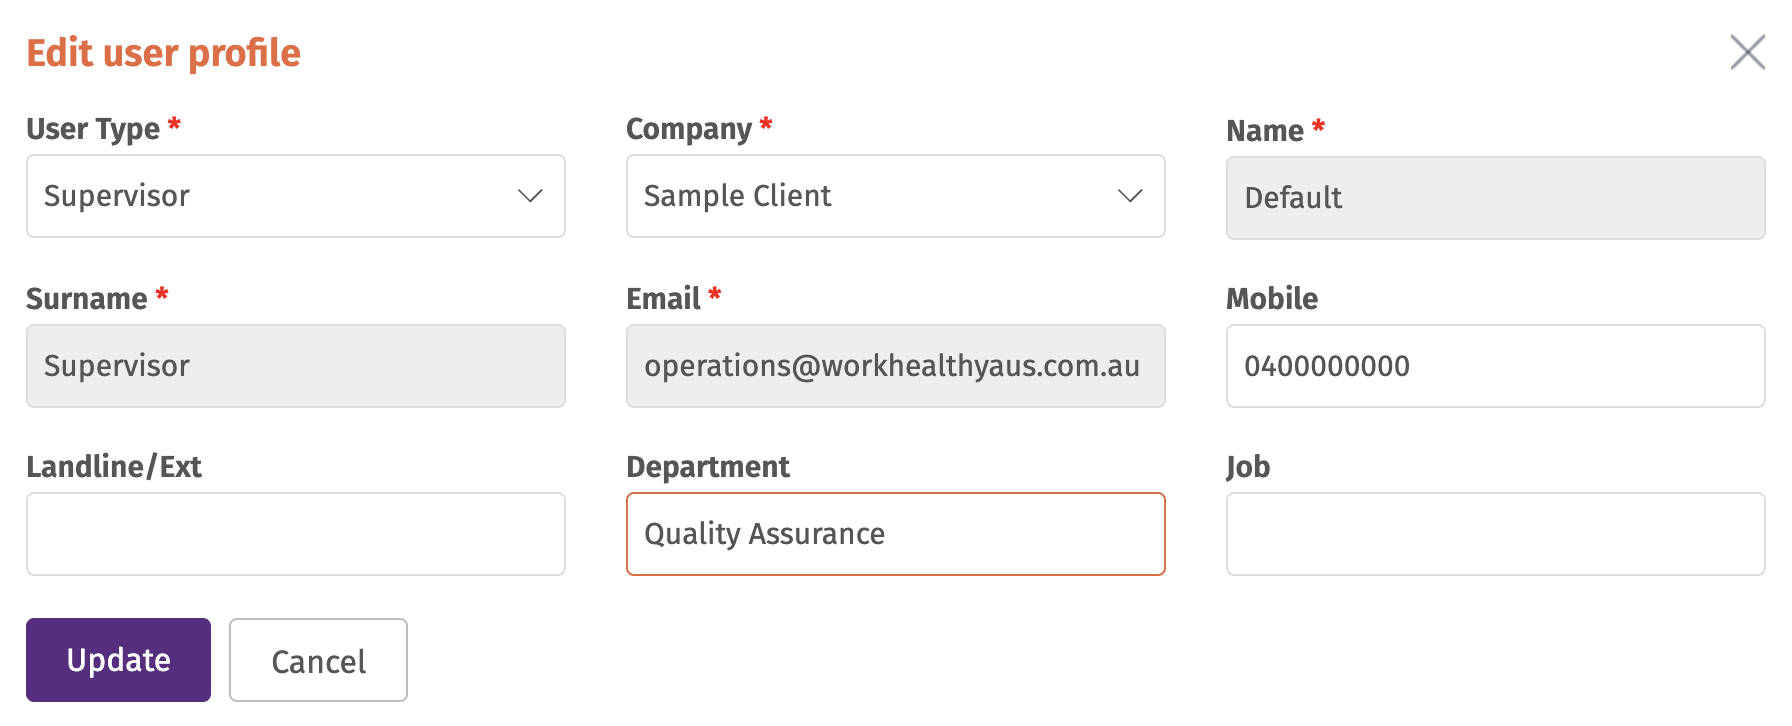
This feature allows you to assign a department name to a supervisor in the User Profiles screen.
Once a department is assigned to a Supervisor, any subsequent appointments created for their workers will automatically populate with the department name.
A department name can be overwritten at any time in the Appointment screen if required.
- Click on User Profiles at the top of the page.
- Here you can search for a specific user name, or filter for user type (e.g. Supervisor).
- Click on
 next to the user’s name.
 - Enter the Department name and click on Update.
Patient appointment reminders must first be activated by Work Healthy Australia. Please contact our Operations team (operations@workhealthyaus.com.au) if you would like to activate patient appointment reminders.
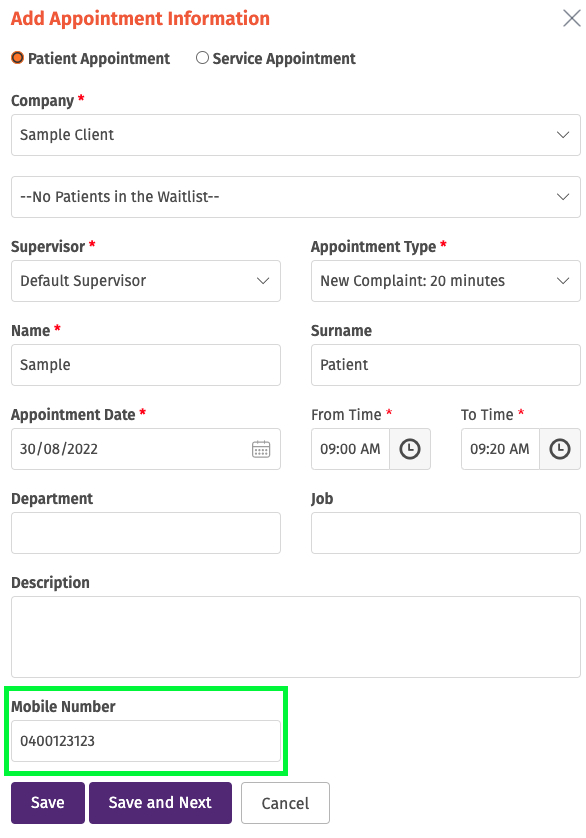
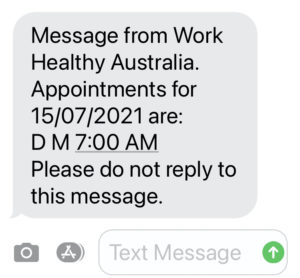
This feature automatically sends a patient an appointment reminder via text message if a valid mobile number is entered. If an automated follow-up appointment is created by our system, the mobile number recorded against the patient’s record will receive the text message reminder.
When scheduling a patient appointment:
- Once all of the relevant fields for a patient appointment have been completed, enter a valid mobile number in the Mobile Number field.
- Click Save or Save and Next to add the appointment to your schedule.
- At 5pm (AEST) the day prior to the scheduled appointment time, a text message reminder will be sent to the mobile number recorded against the scheduled appointment.
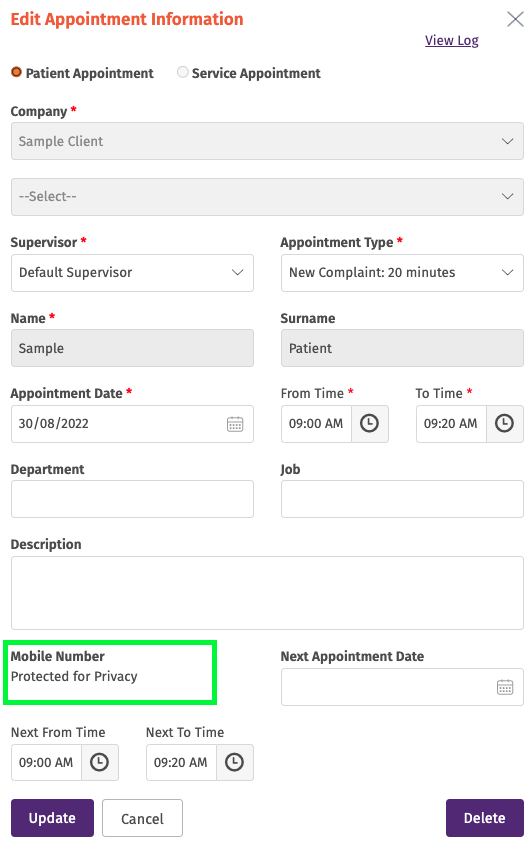
To protect the privacy of our patients, mobile numbers will be masked once an appointment is saved in the scheduler.
- When an appointment has been created using the scheduling system, and
- When an automated follow-up appointment has been created by Work Healthy Australia’s system.
Managing your treatment schedule is made easier with Automated Follow-up Appointments.
At the end of each appointment, your Onsite Health Provider will nominate a date and time for a follow-up appointment. This appointment date/time will automatically populate in the Work Healthy Australia Portal.
Note: New patients, new complaints, PES, FFT, and other appointment types will still need to be managed with a manual entry in the calendar.
Rescheduling an automated appointment entry
You can reschedule automated appointments in the same way as manually entered appointments. Read more in the Moving appointments section here.
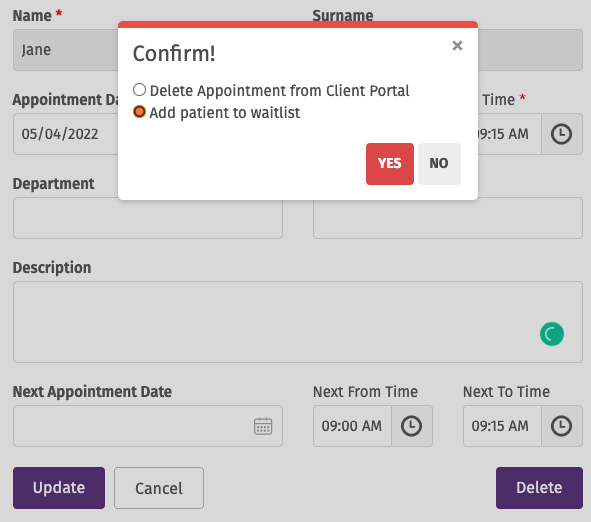
Adding an appointment to the waitlist
This feature was developed to allow you to add an automated appointment to the waitlist to reschedule at a later time. Patients will remain on the waitlist until they are either removed or rescheduled to another time.
To add a patient appointment to the waitlist:
- Click on the “Delete” button in the bottom right corner of the appointment screen
- Select “Add patient to the waitlist”, and confirm by clicking “Yes“
- The patient’s name and details can now be found on the waitlist
NOTE: patients added to the Waitlist will automatically be removed 15 days after the proposed appointment date (assigned at their last appointment).
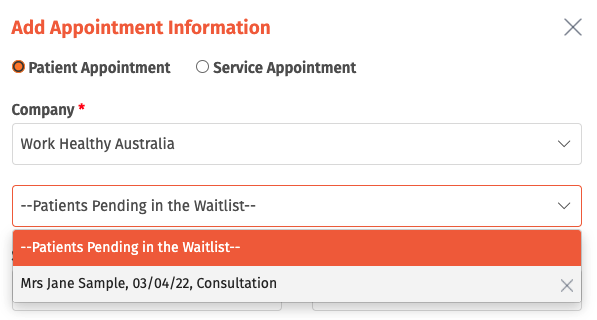
Removing a patient from the waitlist
If a patient has been added to the waitlist and no longer requires an appointment, you can remove them from the waitlist by:
- Clicking on the X symbol next to the patient’s name
- Select a reason for canceling the appointment and leave a comment for our Operations team.
Note: Any information provided here will assist us in keeping our patient records up to date.
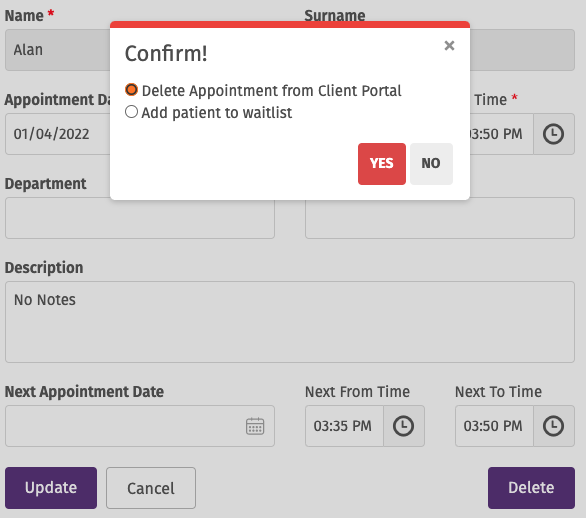
Canceling an automated appointment entry
If an appointment is no longer required, you can cancel an automated appointment. We recommend using this feature when:
- A patient has advised that they no longer require care from Work Healthy Australia
- A patient has left your business and will no longer require care from Work Healthy Australia
To cancel a patient appointment:
- Click on the “Delete” button in the bottom right corner of the appointment screen
- Select “Delete Appointment from the Client Portal”, and confirm by clicking “Yes“
- You will be prompted to provide a reason for canceling the appointment. Select an option and leave a comment for our Operations team then click “Ok” to confirm the cancelation.
Note: any information provided here will assist us in keeping our patient records up to date.

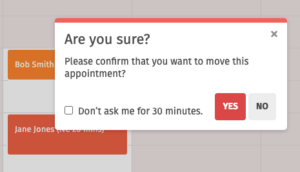
Quickly and easily reschedule appointments by clicking on and dragging an appointment tile to a new time slot on your calendar.
When moving an appointment, you will be prompted to confirm the change. Click Yes to confirm the new appointment time.
If making several changes, you can disable the alert feature for 30 minutes.
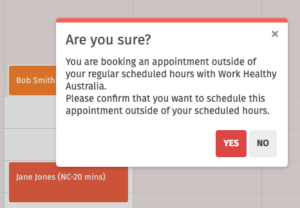
If moving an appointment to a time outside of your regular service hours, you will be prompted with a message to confirm that this is what you want to do, and a notification will also be sent to our Operations team to keep them informed.
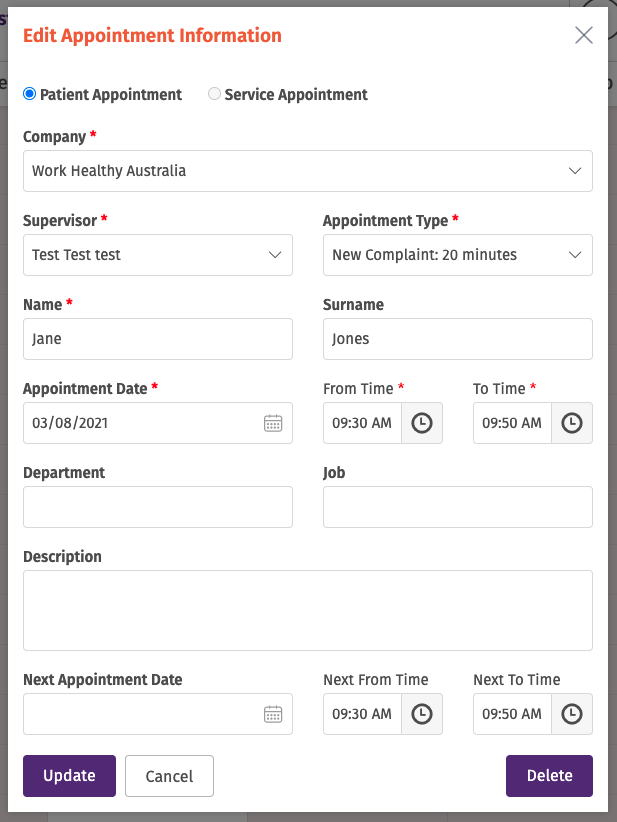
If you need to make updates to an existing appointment, simply click on the tile to view and edit the required fields.
In the Edit Appointment screen you can make updates to the following:
- Appointment date
- Appointment time
- Patient department/job
- Add a description
- Or, use the Next Appointment feature to schedule a follow-up for the patient
Patient Appointments
Return Patient (RP): A follow-up appointment for a worker with a current open care plan with a Work Healthy Australia provider.
New Complaint (NC): A worker with a new injury who has previously had a consultation with a Work Healthy Australia provider.
New Patient (NP): A worker presenting with a new injury who has not had an appointment with a Work Healthy Australia provider before.
Pre-employment Screen (PES): Pre-employment physical assessment of a candidate to determine if they meet the inherent physical demands of a role/s.
Consultation (CS): A contact-free appointment to discuss a worker’s health/injury concerns.
Fit For Task (FFT): Assessment of a worker to determine if they meet the physical demands of a role/s. Ideal for workers returning from injury or changing into a different role.
Ergonomic Assessment (ER): Assessment of an employee’s workspace to identify risks and provide recommendations for improvement.
Mini-medical (MM): A general health exam designed to identify one’s health status, risk of developing a future disease, and requirement for referral/follow-up with a GP.
Injury Prevention (IP): A one-off appointment to address, prevent or reduce the risk of an injury in individuals where there is no presenting injury or complaint.
Work Hardening (WHS): A 5-6 week program that aims to support and condition new workers in manual handling jobs, and help transition existing workers into more physically demanding roles.
Appointment notice:
24 hours: Pre-employment Screens, Fit for Task, Ergonomic Assessments
7 days: Mini-medicals
Service Appointments
Task/Physical Demands: A comprehensive analysis of the entirety of a task/job, including detailed documentation of physical demands and risks.
Provider Floorwalks: A time for an onsite health provider to visit departments/lines, observe workers, meet with supervisors/managers and identify any risks or hazards.
Stakeholder Meetings: A time to meet with key stakeholders to report on progress, discuss long care plans, training opportunities or other business-critical topics.
Toolbox Talk – Manual Handling: A brief presentation of correct manual handling techniques, including explanations and demonstrations. These may be job/department-specific.
Toolbox Talk – Stretching: A brief, guided presentation of appropriate stretching techniques and intervals. These may be job/department-specific.
Supervisor Training: A presentation to supervisors/managers, providing guidance on topics relating to workplace injury prevention, triage and management.
Appointment notice:
7 days: Stakeholder Meetings, Task/Physical Demands, Tool Talks, Supervisor Training.
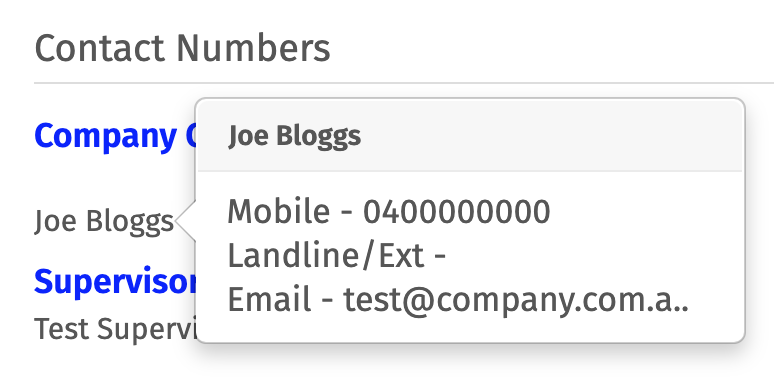
To quickly view a company contact’s phone number and email address, scroll to the bottom of the Appointment Scheduler page.
Simply click on a contact’s name to reveal their phone number and email address.
The User Profiles screen can be used to update company contact information or delete inactive users. In this screen you can filter the User Contact List by:
- Account status (Active or Inactive)
- User type (see user definitions below)
- Company (if you are managing multiple sites)
Viewing user profiles
- Click on the User Profiles Tab at the top of the page
- Optional: filter by Active status, User Type and/or Company
- To view an individual’s User Profile, click on the view
 icon (located on the right next to the user’s Status)
Editing user profiles
- Click on the User Profiles Tab at the top of the page
- Optional: filter by Active status, User Type and/or Company
- To view an individual’s User Profile, click on the edit
 icon (located on the right next to the user’s Status)
 - Here you can edit the following details
- User type
- First Name & Surname
- Email address
- Mobile phone number
- Landline/Extension number
- Job Title
- Assign a supervisor indicator to a Company Contact (to receive email & text notifications)
Deactivating user profiles
- Click on the User Profiles Tab at the top of the page
- Optional: filter by Active status, User Type and/or Company
- To view an individual’s User Profile, click on the delete
 icon (located on the right next to the user’s Status)
 - All inactive user profiles will appear when the list is filtered to “Inactive”
- Inactive users can be reactivated by clicking on the restore
 icon
icon
Adding user profiles
Please refer to Requesting a new user account to learn more.
There are different levels of access associated with each user type.
Company Contact
Has a login and full access to the Work Healthy Australia Portal, including the Scheduler and User Profiles pages.
May also be set up as a Supervisor in order to activate email and text notifications.
Supervisor
Does not have a login and access to the Work Healthy Australia Portal.
Can be allocated as Supervisor when adding appointments to the Scheduler, and will receive email and text notifications.
Sample email notification:

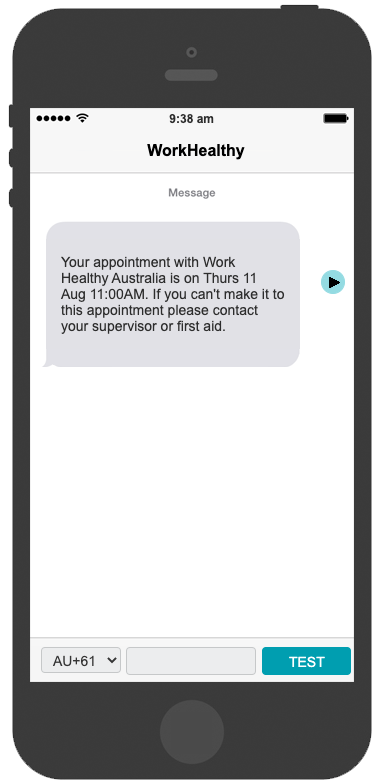
Sample text notification:
New user accounts can be requested via the New User Request form. Our Operations team will endeavor to action any new user account requests within 24 business hours.
- Click on the profile icon
 at the top right corner of the page.
 - Select New User Account from the menu.
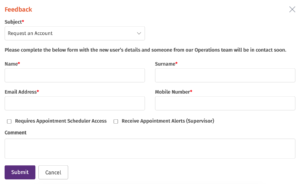
- Complete the following fields:
- New user first & surname
- New user email
- New user mobile number
- Check one or both of the boxes to indicate user access
Please refer to User profile types to learn more. - Optional: add a comment.
For example: if the user needs to be set up for multiple sites.
- Click Submit when done. Your request will be sent to our Operations team, and you will also receive a copy via email.
- New users will be emailed when their account is set up.
The New User Account form can also be accessed via the User Profiles page by clicking on the ![]() button.
button.
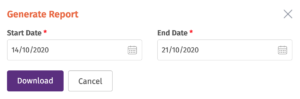
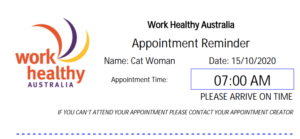
This feature allows you to generate appointment slips that can be handed out to employees as a reminder of their appointment date and time.
- Ensure the Appointment Scheduler is set to the relevant Company.
- Click on the Appointment Slips
 button.
 - Select the date range.
- Click Download.
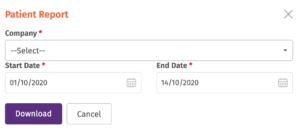
This feature allows you to generate a list of all patient appointments within a date range, including the patient name, appointment type, supervisor name, department, date and time.
- Click on the Appointment Report
 button.
 - Select the relevant Company.
- Select the date range.
- Click Download.
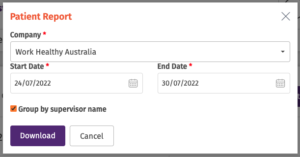
To group the report by supervisor name:
- Click on the Appointment Report button.
- Select the relevant Company.
- Select the date range.
- Check the “Group by Supervisor” box.
- Click Download.
Appointment Report – by date and time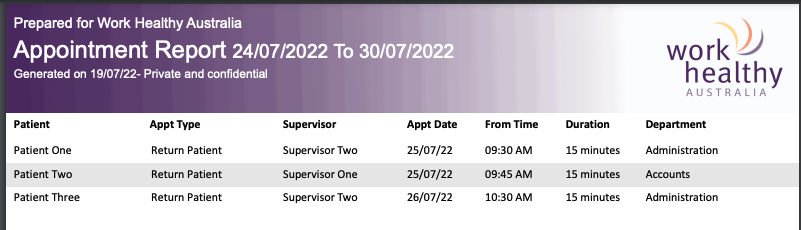
Appointment Report – by Supervisor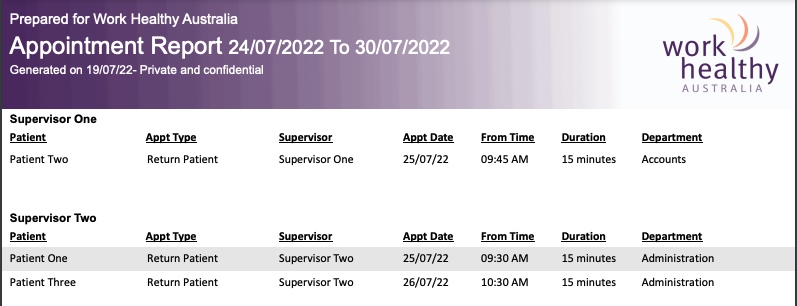
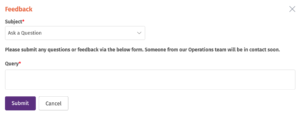
This feature allows you to send us your feedback or questions about the Work Healthy Australia portal.
- Click on the profile icon at the top right corner of the page.
- Select Feedback from the menu.
- Under Subject, select Ask a question from the menu.
- Enter your question or feedback in the Query field.
- Click Submit when done. Your message will be sent to our Operations team, and you will also receive a copy via email.
Please allow up to 24-hours for a response. If the matter is urgent, please call the office.
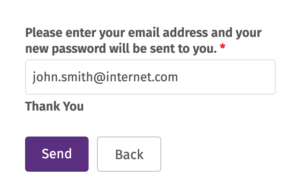
Follow the below steps to reset your password and recover your username.
- On the login screen, click on Forgot password?
- Enter your email address and click Send.
- You will receive an email advising you of your username and issuing you a new password.
- Follow the link in the email to log in with your new password.
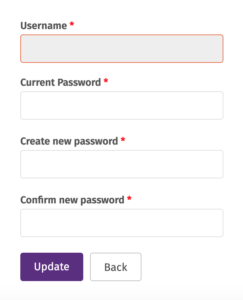
- Click on the profile icon at the top right corner of the page.
- Select Change Password from the menu.
- You will be asked to:
- Enter your current password
- Create a new password
- Confirm your new password
- Click Update to save your new password.
- Click Back to return to the main screen.
Notifications will appear in the menu bar at the top of the page when you log in to the Appointment Scheduler to alert you to any recent updates or system improvements.
- Look for the
 symbol, and click on it to see a preview of the notification.
 - To view the full notification simply click on it to open the Notifications List. To view each notification, click on the view icon

- Once you have finished reading click on the
 button and the notification will disappear from the preview at the top of the page.
 - If at any time you want to revisit a notification this can be done via the notifications list tab at the top of the page.